

When you want to establish a presence online, whether for network marketing or anything else, it is a good idea to have your own website, a space online that you control. I have used HostMonster for several years and have been very pleased with their service. In the spirit of full disclosure, I am an affiliate. If you use this link I will make a one-time commission. Once you have created your account, become an affiliate yourself so that you can make a little bit extra from your website.
This page is a walk-through of how I would sign up with HostMonster if I was starting new today. To start, go to HostMonster. This will open in a new tab and I will walk you through it below.
Before you get started, have a list of two or three ideas for your website domain, the URL to the website that you will create with your account. You will need it on page three.
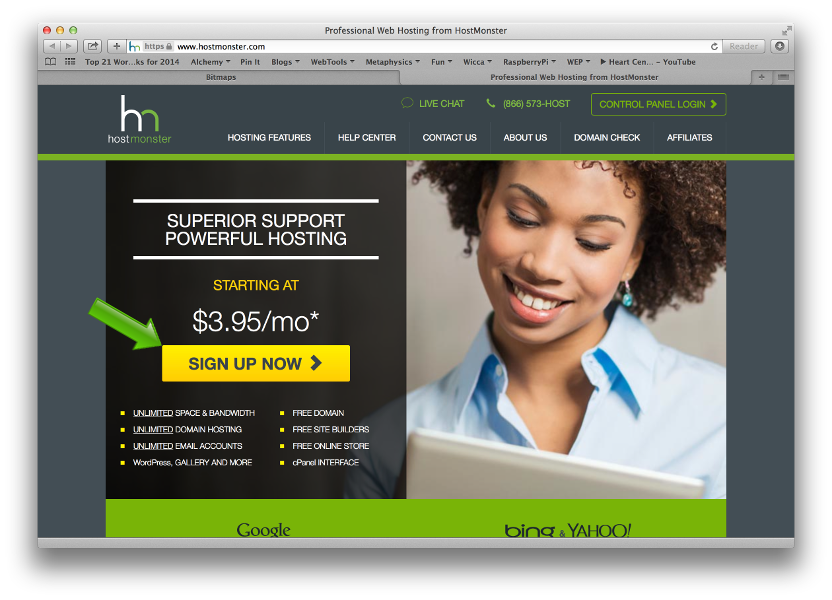
The main page on the HostMonster website. You can see the current special price then click the “SIGN UP NOW >” button.
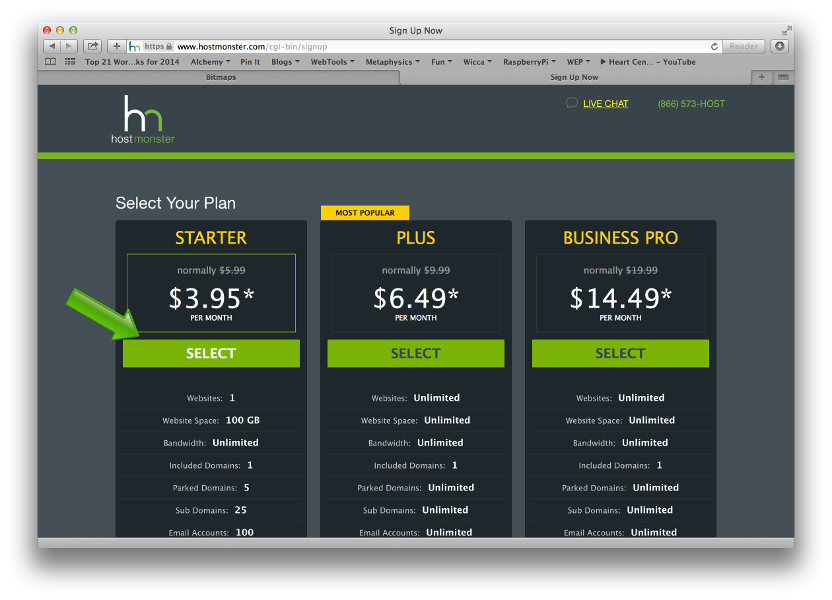 On this page you select your plan. I recommend the Start Plan for now. It is the least expensive, gets you one website and up to 100 email accounts on it. If you know that you are going to have more than one website then you can choose the Plus Plan. You can always upgrade later if you decide to. Click your plan and go to the next page.
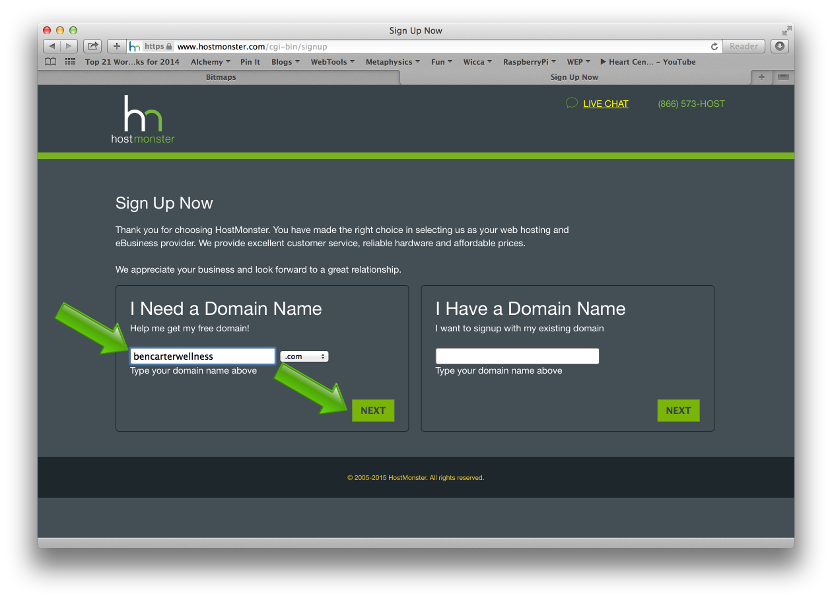
With your new HostMonster account you get one free annual domain registration. Enter the name of the domain that you want to use in the box with the arrow in the picture above. Just the domain name, not the “www.” in front or the “.com” after, just the middle part. In the example above my URL will be www.bencarterwellness.com, so my domain is just bencarterwellness. Click Next. If your domain is available then you are done with this step and can skip down to the next picture. If your domain is taken, HostMonster will recommend something similar and let your try again. Once you have successfully chosen a domain you can skip down to the next picture.
If you already have a domain registered, perhaps with GoDaddy or some other domain registrar, but do not have a hosting account with them, then you can use that existing domain with your new HostMonster account. Enter that domain in the box under “I Have a Domain Name” and click that Next button. You will have to jump through some additional hoops to get your domain linked to HostMonster. I don’t cover that here but I can help guide you through it. So can HostMonster’s tech support people.
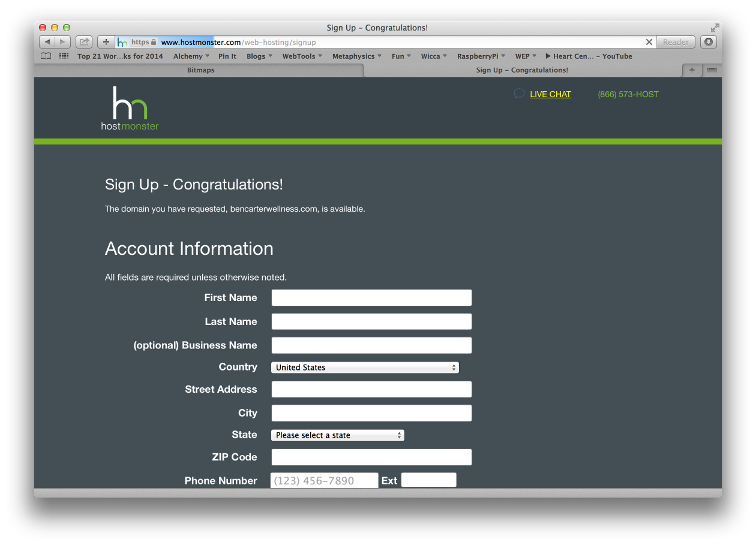
Once you have successfully registered your domain you can enter your account information. This is straight forward. This page is a little long, so scroll down to the next picture for the next section.

Now you need to select your package. Here I have assumed that you chose the Starter Package. Click the drop down box next to Account Plan (see the green arrow above) and you will see the available terms. You can choose 1 year, 2 years or 3 years. The longest term has the lowest introductory price and the shortest term has the highest. Keep in mind that you pay for the entire term up front, right now actually. If you are committed to this path and have the funds ($3.95 * 36 months = $142.20 in this case) then choose the longest term. If you are only committed for a year to try this out or only have $71.40 (at the current 12 month price) that you can invest right now, then choose the shortest term.
Next you see the section I highlighted in green in the picture above. I turned all those options off. I don’t use them and have never even looked into them. If there is something you feel that you need then check the box. They all cost extra. Some are billed up front while others are billed monthly.
Scroll down for the next section.
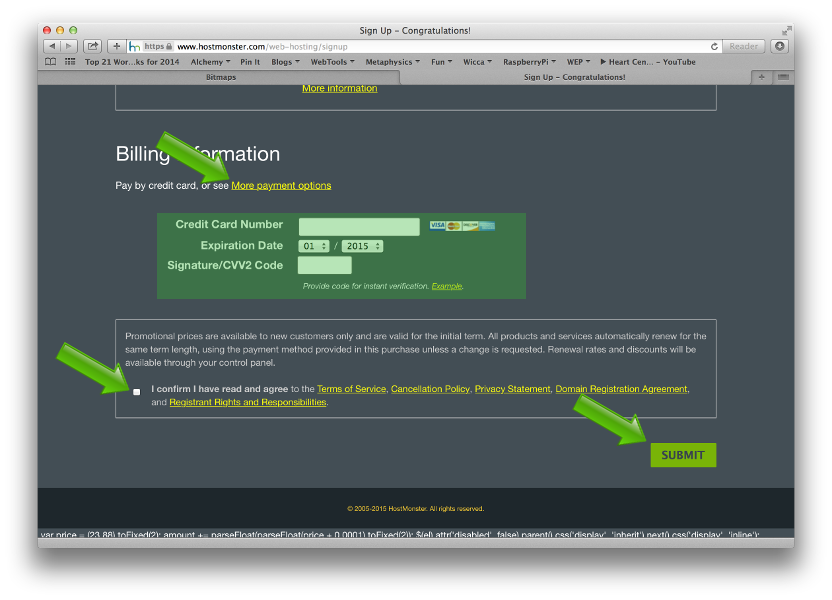
All that’s left is to enter your billing information to pay for all of this. You can use a credit card to pay for this as you can see in the highlighted section above. If you have a Paypal account and want to use it, then click the “More payment options”link (see the first green arrow above) and the Paypal option will appear.
Check the box (second green arrow) to confirm that agree to the terms of service, cancellation policy, etc. then click the Submit button at the bottom of the page.
That should cover it. You will receive your password and order confirmation emails at the email address you entered in the Account Information near the top of this page. Your username is the first 8 characters of your domain name. If you remember, my domain name was bencarterwellness, so my username is bencarte.
Once you have your hosting account ready to go you will probably want to install WordPress to make it easy to create your actual website. This 11 minute video walks you through the process.